Members

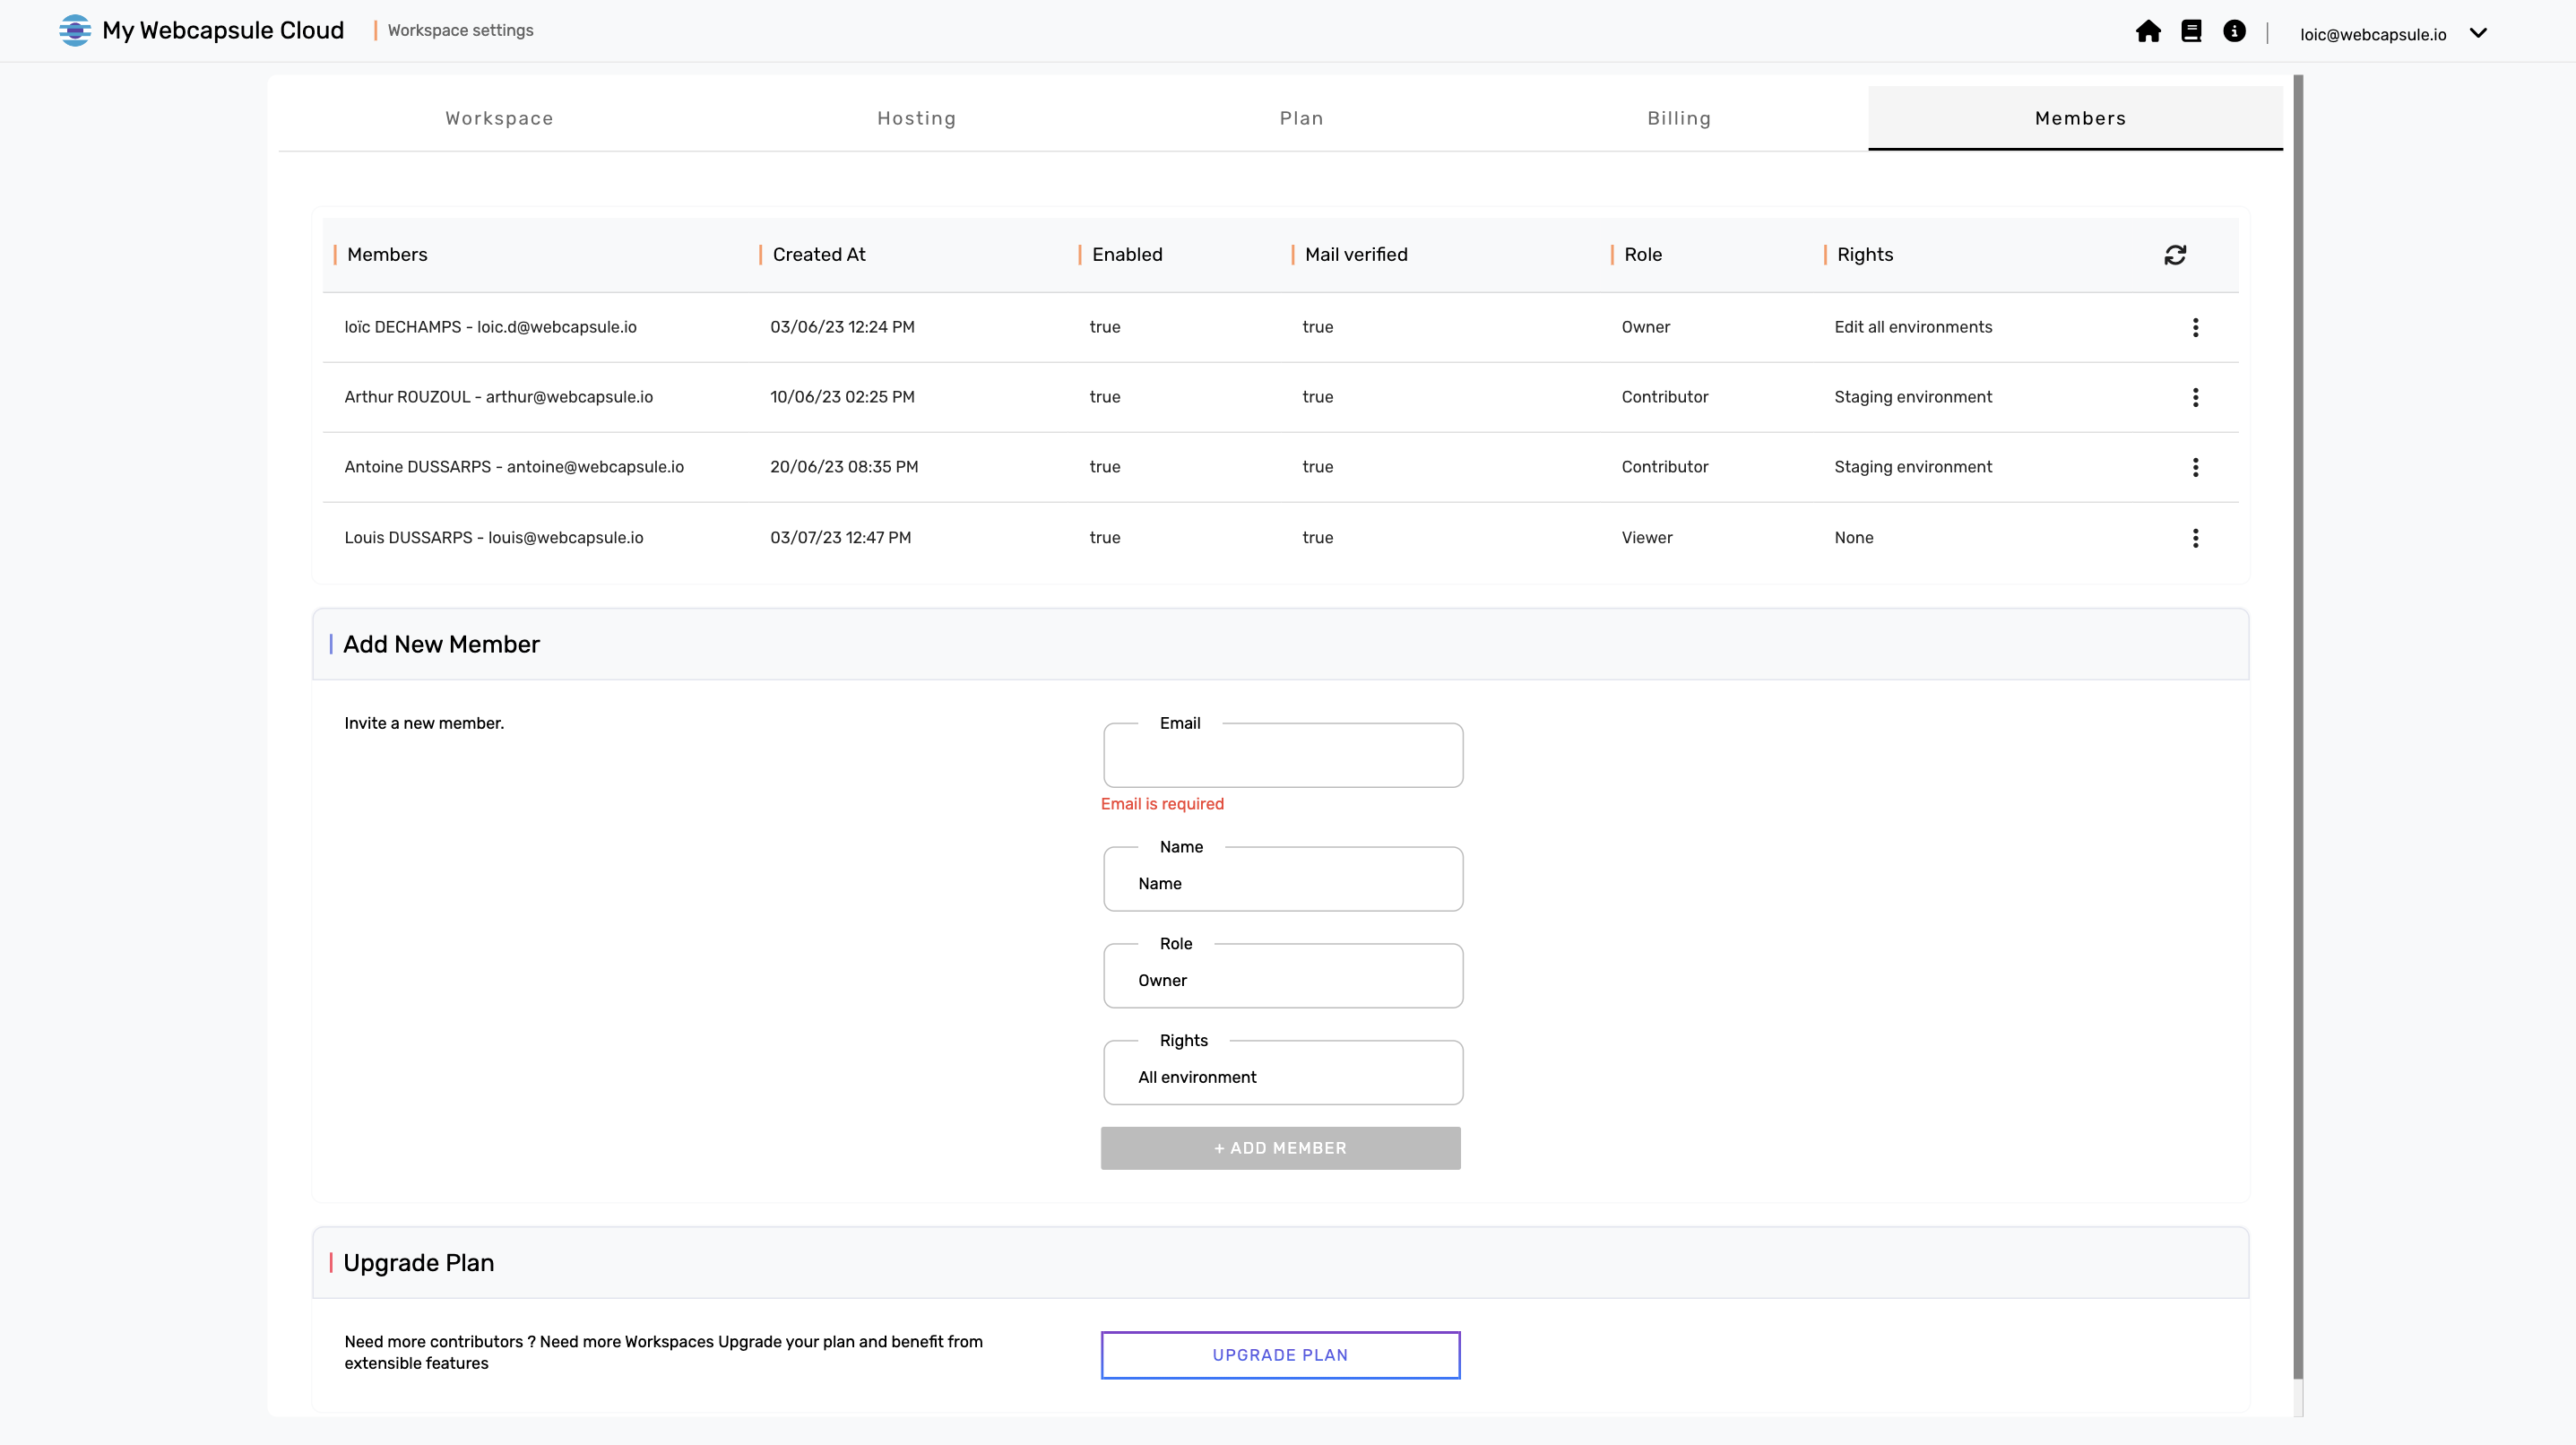
The "Members" section in the management of your Workspace is essential for collaboration and sharing rights with other users. Here's what you can do in this section:
Managing your team members
- Members: Name and email of current team members
- Created At: Date of adding the member
- Enabled: Account activated or not - you can enable or disable an account via the Action button
- Mail verified: For an account to access the services, it must first be validated by the user via the invitation email sent to them
- Role: There are three different roles within the Workspace: Owner, Contributor, and Viewer. Each of these roles has different rights and permissions. You can assign a role to each member of your team based on their responsibilities.
- Rights: This section defines the specific rights of each member on each tool within your project. These rights determine the actions a member can perform in the project, such as using the tools or the environments in which they are invited to contribute.
- Actions: You can perform various actions on your team members, including modifying their information, changing their role, and deleting members.
Add a member
To add a new member to your team, you need to provide their email address, name, role, and rights. Once added, an invitation email is sent to the user so they can create an account linked to your Workspace.
Change plan
If you need more contributors in your Workspace, this option allows you to change your plan to get more capacity. This can be useful when your team is growing and needs more resources to work on your projects.
Member management is essential for effective collaboration within your Workspace, allowing users to access projects, perform specific actions, and share responsibilities based on their role.